Install guide
Install Kvist, step by step
Eight steps from an empty terminal to your first task. Every screenshot is the real installer and the real interface, with the parts to look at outlined and numbered. Every command has a Copy button.
Before you start
- A terminal on Linux, macOS or Windows (macOS without guarantees)
- No Python and no administrator rights are needed
- A provider API key, or a ChatGPT Plus/Pro subscription to sign in with
About the screenshots They were taken from the release installer in a clean home directory. The last two show a local test gateway instead of a real provider, so the provider and model names there are not what you will see; the layout is.
Run the installer
Open a terminal and paste one command. It downloads the agent and Node.js into a temporary folder and writes nothing until you confirm on the next screen.
curl -fsSL https://github.com/davud-d/Kvist/releases/download/latest-plugin-build/install.sh | bash
irm https://github.com/davud-d/Kvist/releases/download/latest-plugin-build/install.ps1 | iex
On Windows the installer has no component screen yet: it installs the defaults and finishes. Skip to step 07.

- Nothing is installed until you choose it on the next screen
- The agent binary downloads into a temporary folder
Choose what to install
Arrow keys move, Space ticks or unticks, Enter installs. The defaults are fine: the Kvist agent is required, and Node.js runs the terminal interface. Untick anything you do not want, such as the desktop app or an editor extension.
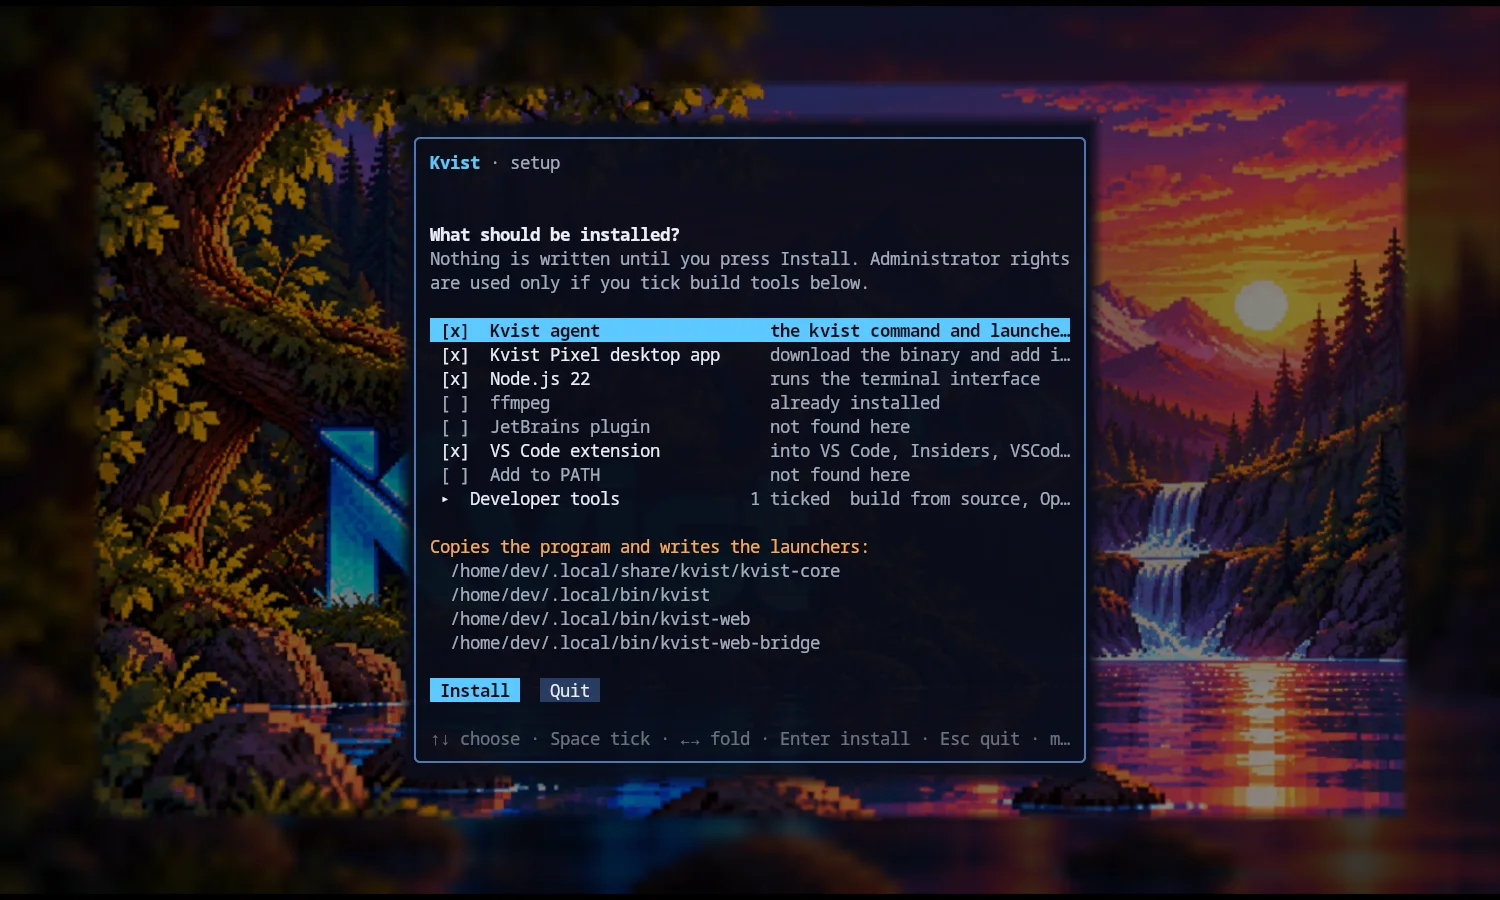
- The Kvist agent: the kvist command itself
- Node.js 22: runs the terminal interface
- Exactly what will be written, and where
- Install starts it; Esc quits with nothing written
Wait for it to finish
Each component shows its own state and the bar counts finished ones. Files go under ~/.local/share/kvist and the launcher goes to ~/.local/bin. It usually takes a minute or two.
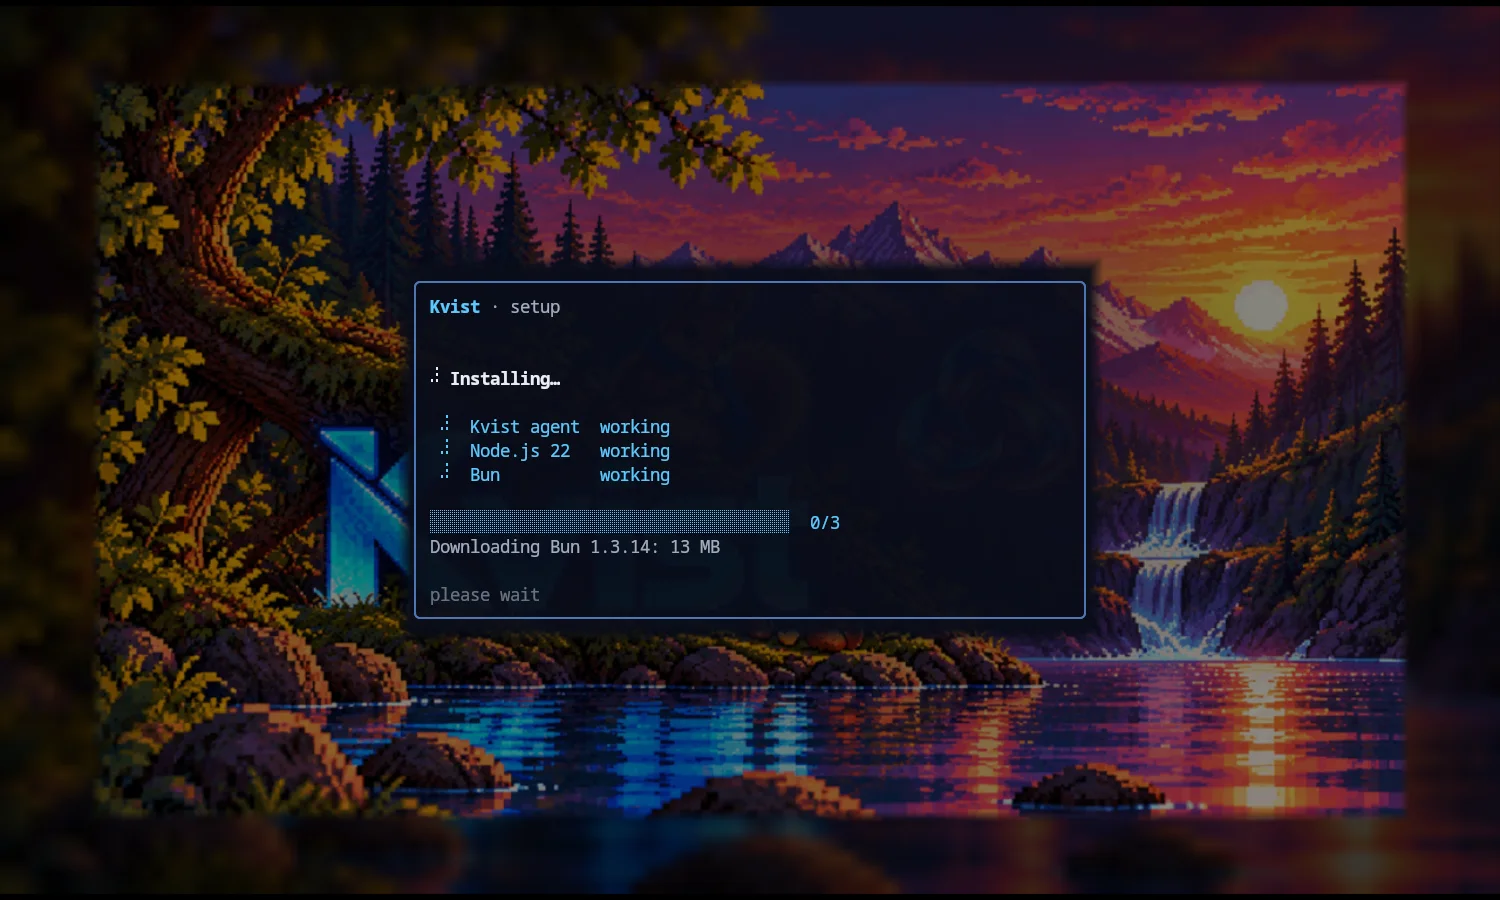
- One line per component you ticked
- Progress and what is downloading right now
Start the first-run setup
When the installer says Installed, the same window continues into setup. It tells you what Kvist will not do: it does not read .env files or SSH keys, it asks before risky commands, and /revert undoes what it changed. Press Enter on Get started.
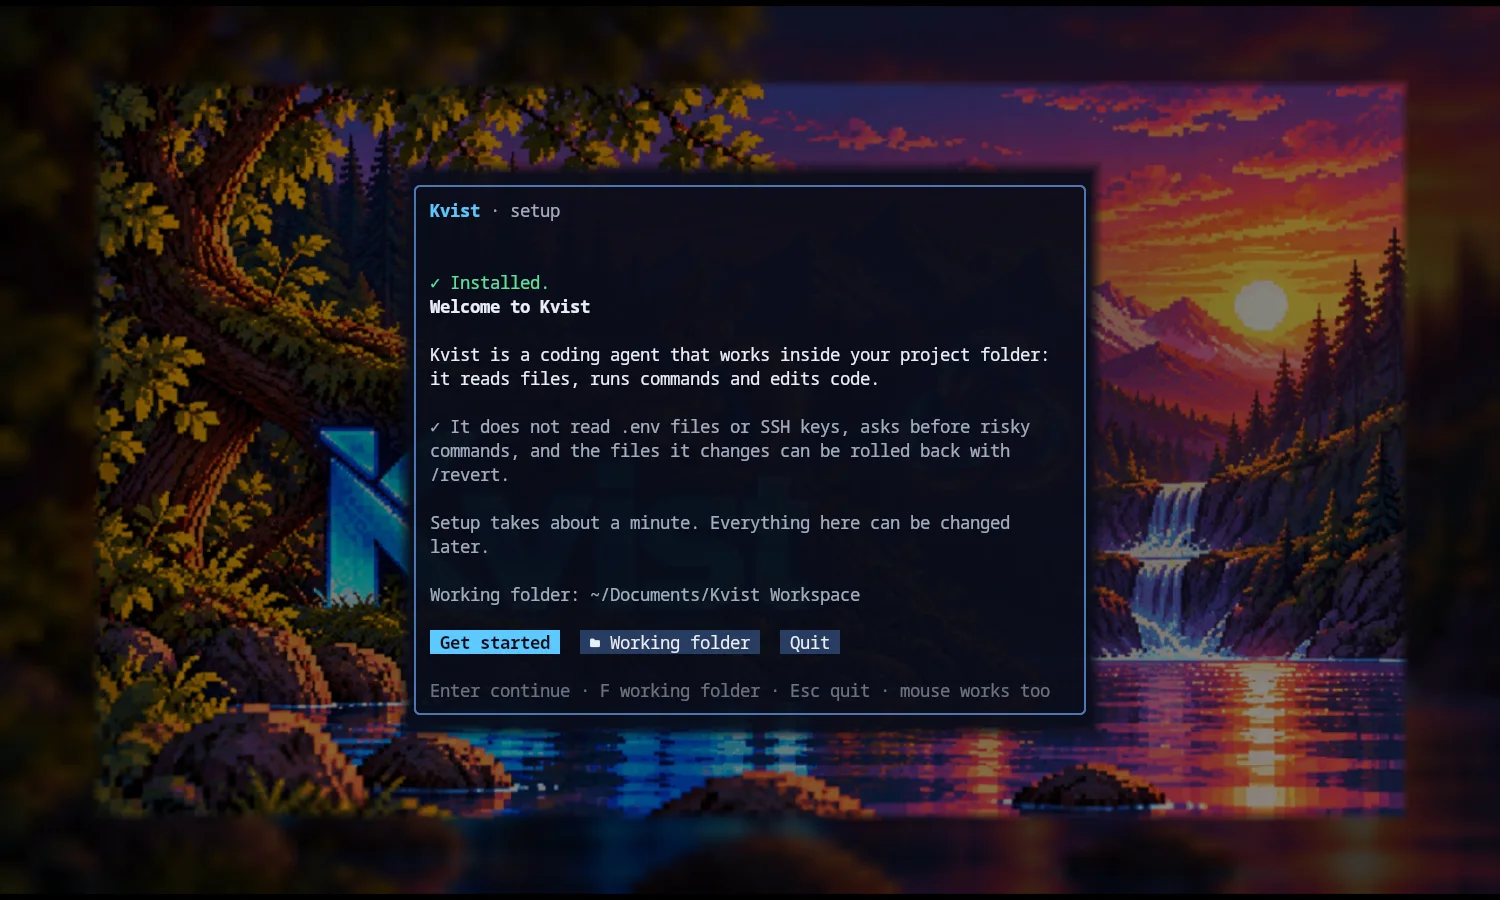
- The installation is done
- The folder Kvist will work in; press F to change it
- Get started continues
Pick where the model comes from
Choose a provider with the arrow keys or the number, then Enter. You can add more or switch later with /provider. ChatGPT Plus/Pro signs in with your subscription instead of a key; More providers opens the longer list.
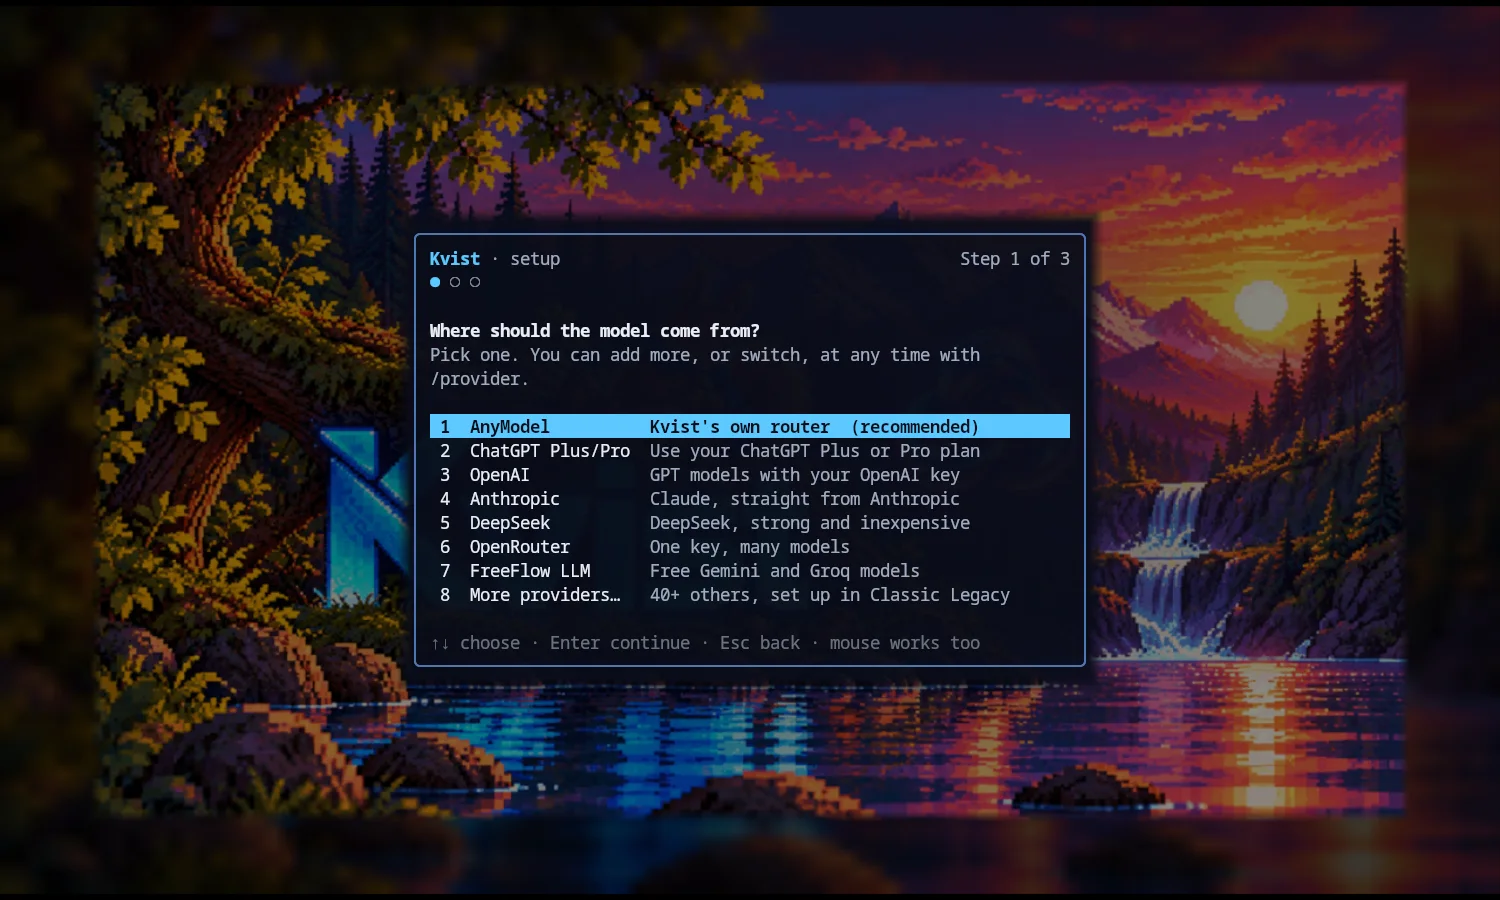
- AnyModel, Kvist's own router, is the recommended start
- Sign in with a ChatGPT Plus or Pro subscription
- Forty more providers, set up in the classic terminal
Paste your key
Paste the key and press Enter; Tab shows or hides it. It is saved only in ~/.kvist/config.json on this computer, never in a project. Without a key yet, the registration button opens the provider's page. After that the setup may ask for models and which interface to use; the first interface in the list is the one most people want.
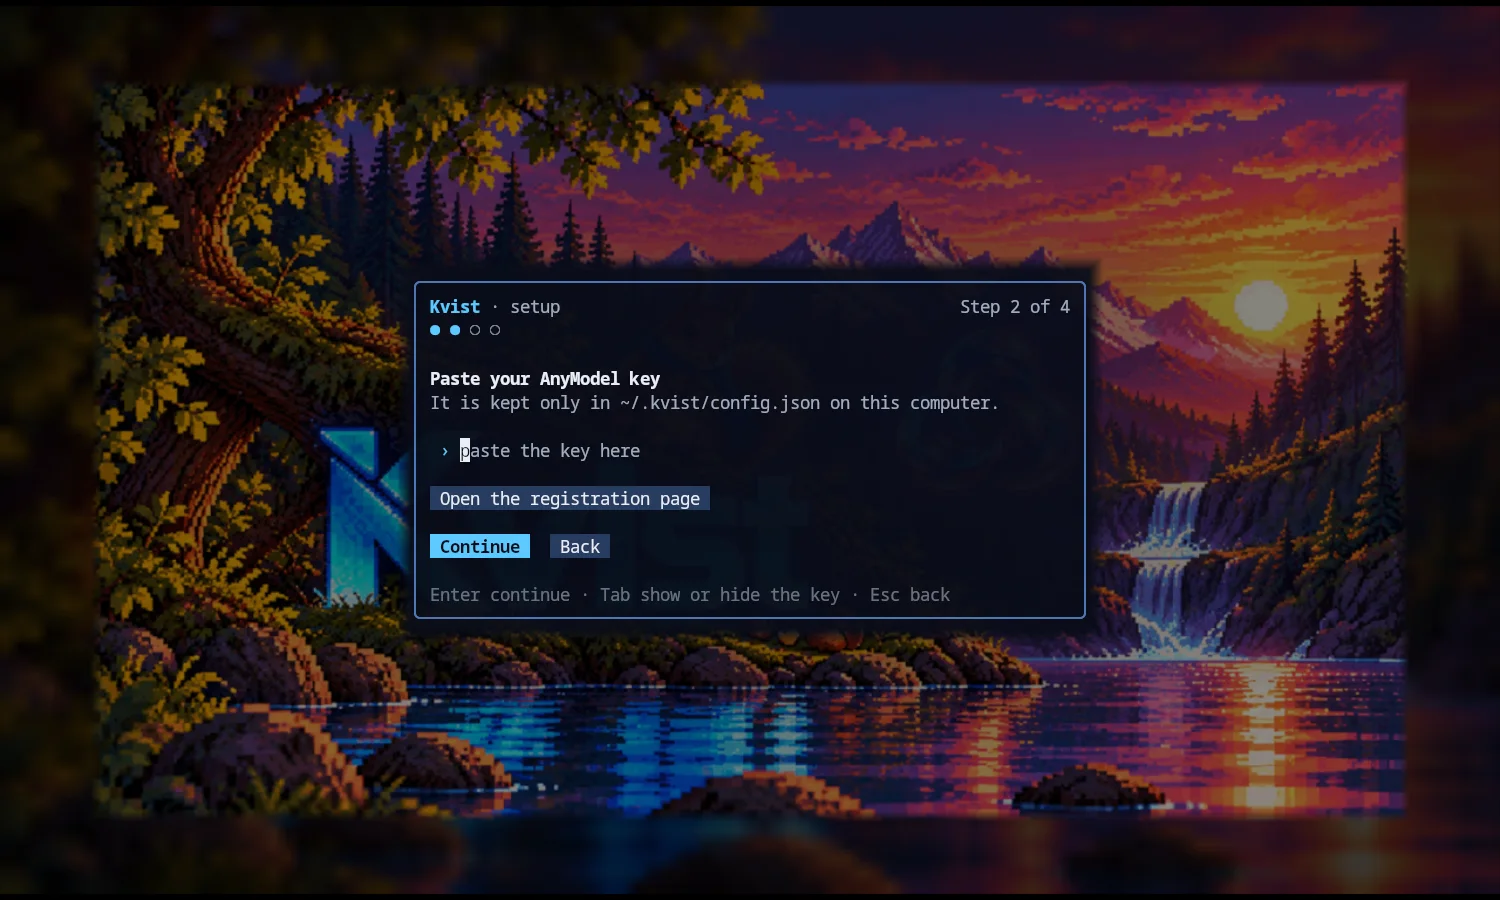
- Where the key is kept
- Paste it here
- Opens the registration page if you have no key
- Continue saves it
Start Kvist in a project
Go to your project folder and run kvist. The current folder becomes the workspace: Kvist reads, edits and runs commands only inside it.
cd ~/project
kvist
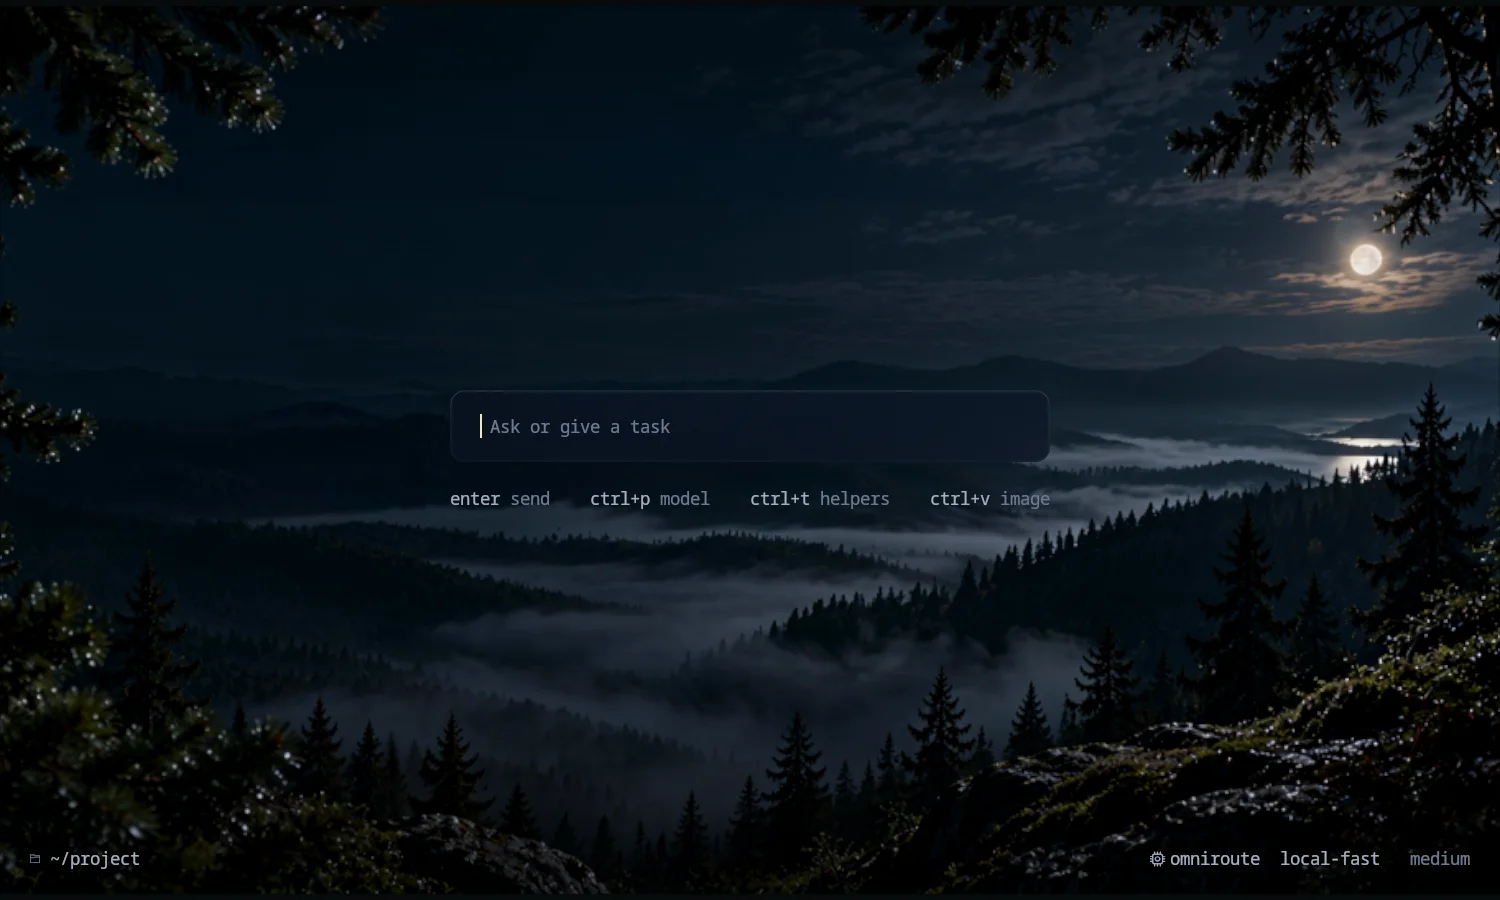
- Where you type your request
- Enter sends, Ctrl+P picks the model, Ctrl+T shows helpers
- The provider, model and reasoning effort in use
- The workspace: the only folder Kvist works in
Give it a task
Type what you want in plain words and press Enter. Type / to see the commands. Approvals appear inline: answer them and the run continues. When it is done, /changes shows what was written and /revert puts it back.
/changes
/revert
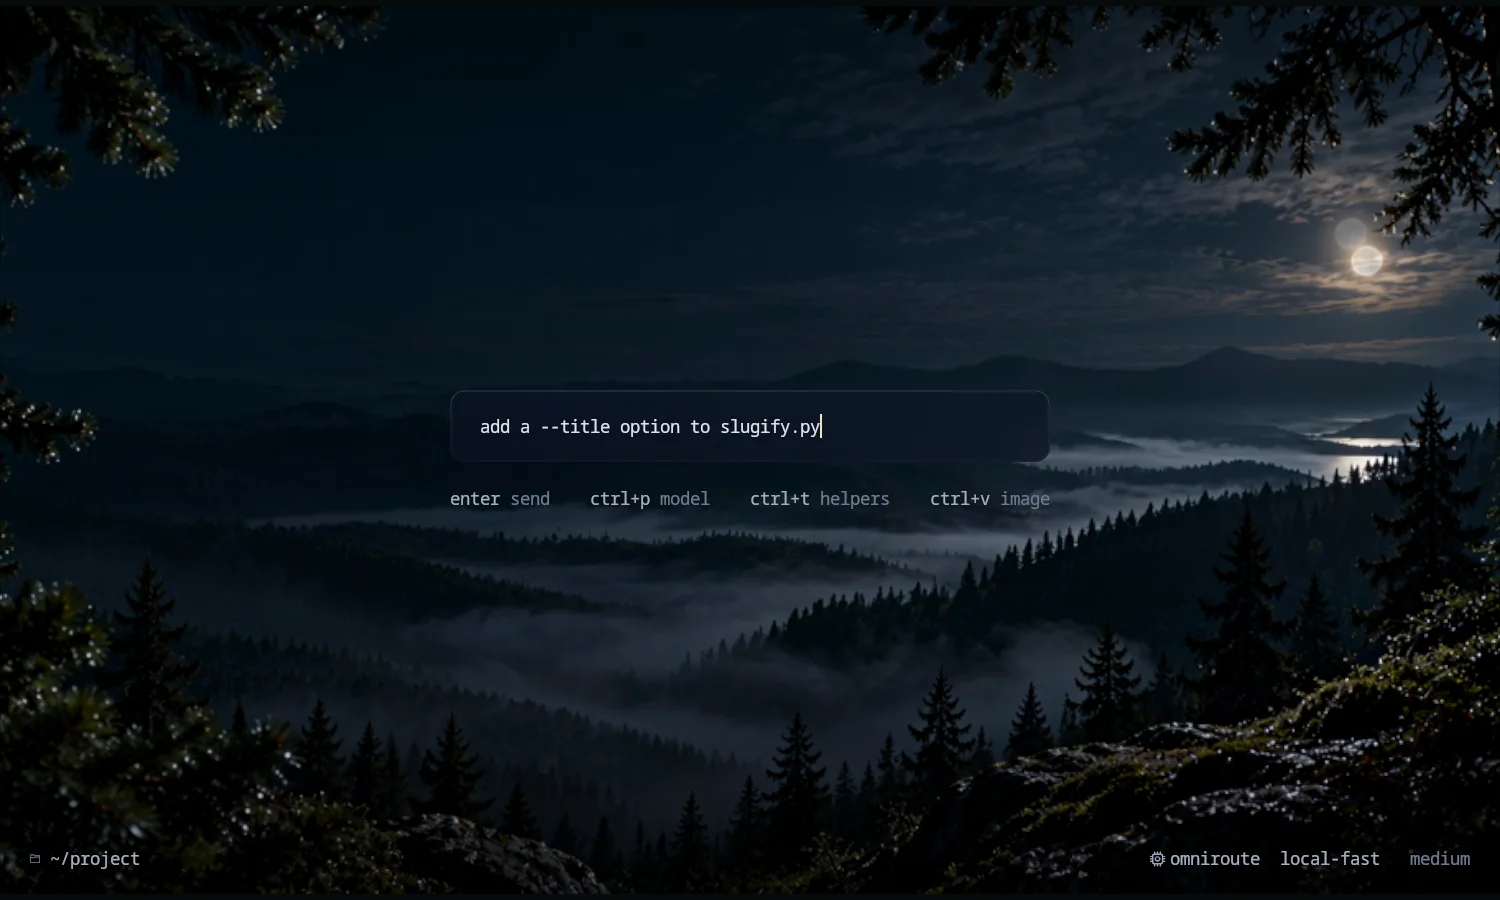
- Your request, in plain words
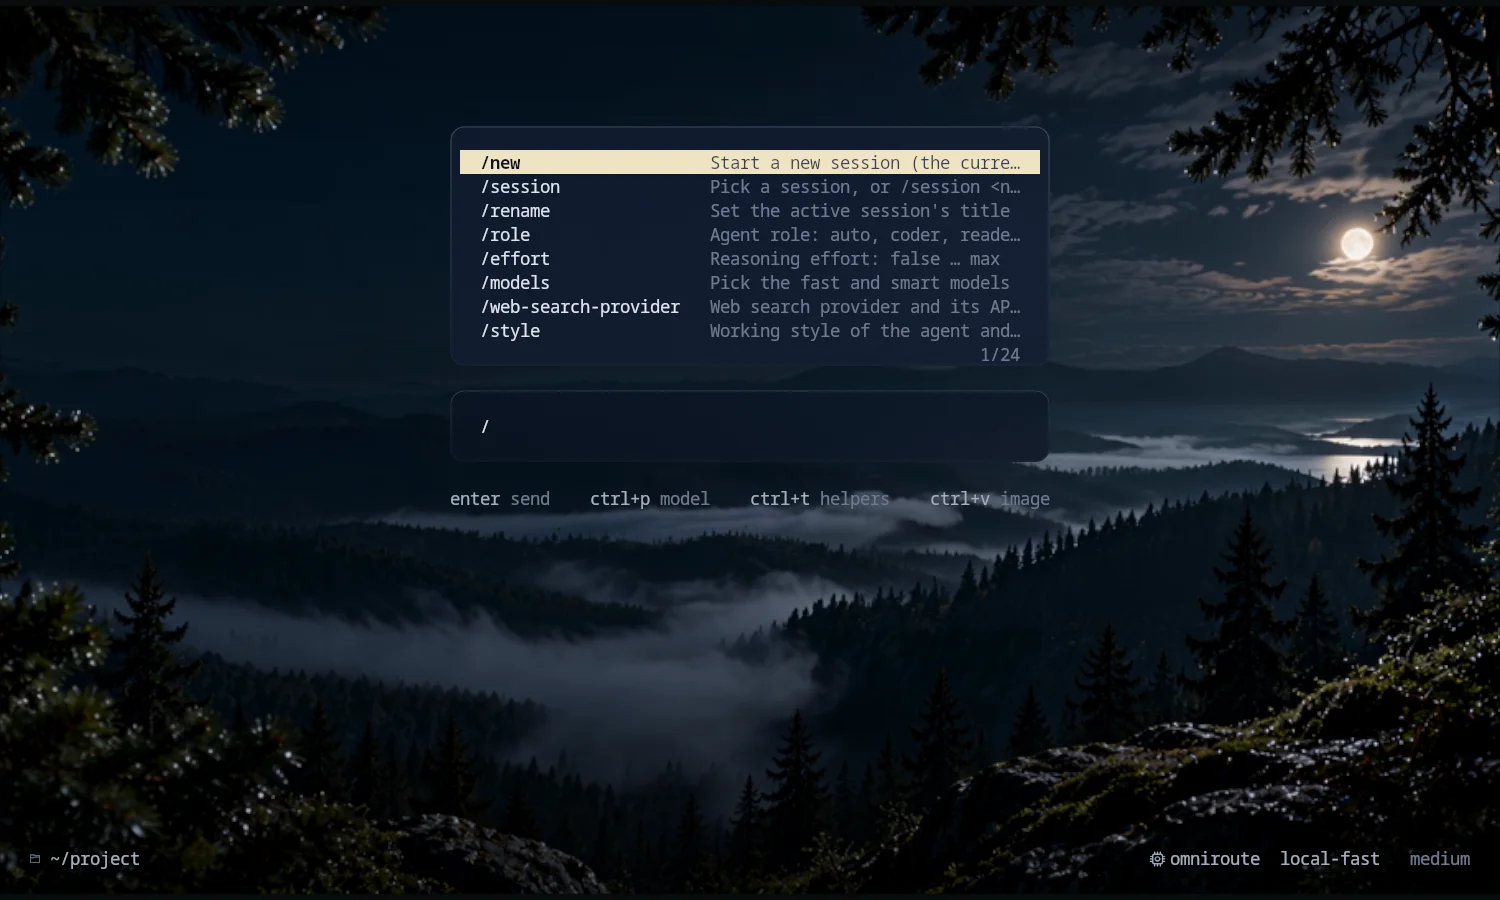
- Typing / lists the commands; /commands prints them all
Prefer to run from source? It needs Python 3.11+: clone the repository, install requirements.txt in a venv and run main.py --workspace <path>. See the repository README.